
“The Importance of Clean Dryer Vents: Why and How to Maintain Them”
Dryer vents are often overlooked when it comes to home maintenance, but keeping them clean is crucial for both the efficiency and safety of your dryer. In this blog post, we’ll explain why you should prioritize dryer vent cleaning and provide simple steps on how to do it.
Why Should You Keep Your Dryer Vents Clean?
- Fire Prevention: Perhaps the most critical reason to clean your dryer vents is to prevent house fires. Lint and debris can accumulate in the vent over time, creating a highly flammable environment. According to the U.S. Fire Administration, thousands of dryer fires occur annually, many of which could be prevented through regular maintenance.
- Improved Efficiency: A clogged vent restricts the flow of air, making your dryer work harder and longer to dry your clothes. This not only increases your energy bills but also shortens the lifespan of the appliance.
- Faster Drying Times: When your dryer vents are clean, your dryer can operate at its optimal efficiency, resulting in faster drying times for your laundry.
- Lower Utility Bills: By reducing the drying time and energy consumption, you’ll save money on your utility bills.
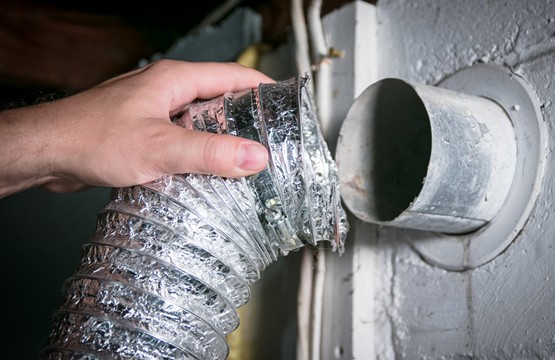
How to Clean Your Dryer Vents
Cleaning your dryer vents doesn’t have to be a complicated task. Here’s a simple step-by-step guide:
Tools and Materials You’ll Need:
- Screwdriver
- Vent brush or vacuum attachment
- Safety glasses
- Gloves
- Dust mask
Steps:
- Safety First: Before you begin, make sure to unplug your dryer and turn off the gas supply if it’s a gas dryer. Safety glasses, gloves, and a dust mask are also recommended to protect yourself from dust and debris.
- Pull the Dryer Away from the Wall: Gently move the dryer away from the wall to access the vent.
- Disconnect the Vent: Loosen the clamp holding the vent to the dryer and wall using a screwdriver. Carefully disconnect the vent from both ends.
- Clean the Vent Tube: Use a vent brush or a vacuum attachment designed for dryer vents to remove lint and debris from the vent tube. Make sure to reach as far as you can, both from the dryer side and the wall side.
- Check the Vent Cover Outside: Go outside to where the vent exits your home. Inspect the vent cover for any blockages and remove any debris that might be obstructing airflow.
- Reconnect Everything: Reconnect the vent to both the dryer and the wall, ensuring that the connections are secure. Tighten the clamps.
- Move the Dryer Back: Gently push the dryer back into place.
- Plug It In and Turn It On: Plug in your dryer, turn on the gas supply (if applicable), and run the dryer for a few minutes to ensure there are no issues with the reconnection.
- Regular Maintenance: Make it a habit to clean your dryer vents at least once a year or more frequently if you notice longer drying times or reduced airflow.
By following these simple steps and making dryer vent cleaning a part of your regular home maintenance routine, you can ensure that your dryer operates efficiently and safely, reducing the risk of fires and saving you money on energy bills.